
Summer is just around the corner here in Tassy. The days are notably longer and we are thankful to come through a third winter with minimal weather related interruptions.
Work on the turret is now well underway. Next week we will begin installing the roof. Once that job is done, we only have the cockpit furniture to install and all the major fabrications will be complete.
For the first time we have started thinking about the final stages of the build, and have imposed some deadlines on ourselves. Our preference is to have Selah in the water sometime before the end of March 2019. To see if that was feasible, Pete sat down one day, and started listing all the jobs to be done, trying to estimate how long each would take. That all became too hard, so we settled on a simplified target. The first aim is to finish construction, fiberglassing, painting and steering by Christmas, preferably earlier. This will then give us three months to fit electrics, plumbing, hatches, deck-gear and get her in the water.
Yes, we risk embarrassment by putting it out there, and the truth is, we have no idea if our targets are do-able. However, at the beginning of this blog, we invited you along for the journey warts and all, so here it is! If we miss them, it will be a mid winter dash across the strait, something to be avoided due to the wild westerlies that dominate there after.
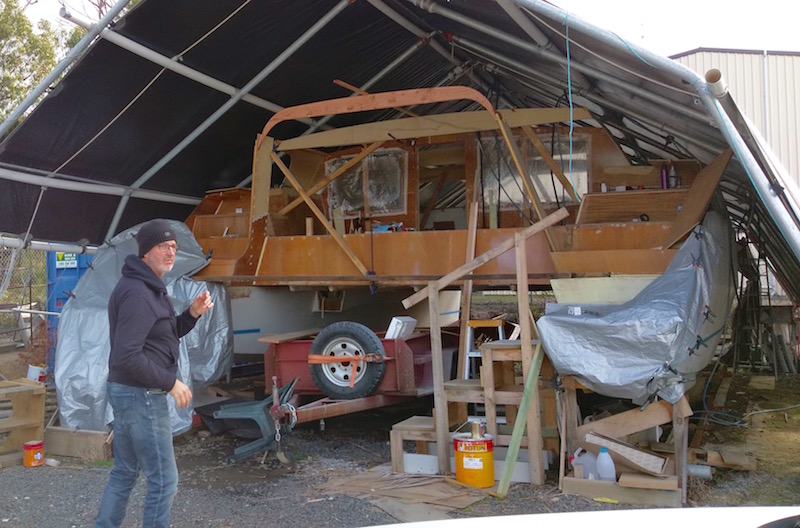
Having completed the main decking we set about building the turret. This process includes the cockpit roof and the targa bar. They are all interconnected.
Building the turret has been one of the most enjoyable fabrications of the entire build. The designer gives just a few principal dimensions, but as every surface is cambered, curved and angled there is not a right angle to been found anywhere. This means, to a certain extent, it is up to the builder to create their own unique version. The designer advised us to take our time, and try to massage as much “shape” as possible, to avoid the structure looking to boxy. It would be fair to say, when choices had to be made, we priorotised aesthetics.

Two decision were made early on. Firstly, a year ago, when we built frame seven, we chose to increase the pitch of the sides to 30 degrees. Secondly, instead of fixing the turret sides on top of the deck, we glued carlin blocks underneath the deck, machined to correct angle, and dropped the sides down into the boat by 90mm, gluing them to the blocks. This is closer to the traditional way of securing cabins, and has some advantages. We found the sides naturally adopted the angle, with very little twist to battle, something we had been warned about.

We then fitted a number of temporary support beams that were cut to the camber specified by the designer, to provide a base for the roof sheeting. Later, windows are cut out, and the turret sides then double laminated to a thickness of 18mm. As well as supporting the roof, this sturdy structure is also subject to rig loads. The genoa and mainsheet tracks are mounted atop, as well as some winches.

After fixing the temporary supports, we machined the upper chine, and fixed in place. This provides a gluing surface for the roof ply.

The next step was to build the targa bar, as it supports the aft end of the roof. This was quite meaningful to us, as it closed the circle. The base was one of the first elements we built after roll-over day.

Positioning the main targa beam was tricky, as it was another of those “floating in space” fix points. It adopts the top-side angle of 18 degrees, and is angled back 20 degrees. fortunately the designer gives some reference points, which we were able to use to fabricate a template out of chipboard and scraps. This then enabled us to establish final height which is determined by the profile curve of the cabin roof.


The template was used to fabricate the bar from a length of 24mm thick oregon, which was edged trimmed and sanded prior to fixing in place.

The targa bar is important to the look of the boat. It adds an attractive curved element that offsets the inherient boxy nature of plywood construction. In addition it provides a fixing point for the dingy alllowing it to be lifted out of the water for passages.

Ambitious deadlines guys! But don’t get fixated on them too much. Whatever you do, get her all finished before you put her in the water! You see quite a few home built boats where the owners were itching to go and put theirs in the water before they were totally finished and years later they are still not finished!
April May onwards is not just hard for crossing Bass Strait, it is tough going up the NSW coast with few places to hide that are not requiring bar crossings.
LikeLike
Hi guys. Yep, ambitious for sure: but we figure a target gives us something to aim for, even if we miss it. In reality it’s unlikely we we would attempt a winter crossing, especially in an untested vessel. You are experienced voyagers, and we recall how hard you found your winter trip north. Not the way we want to begin our life aboard! Thanks for your input, we appreciate your thoughts.
LikeLiked by 1 person
Deb & Pete,
Wonderful workman/womanship on your build and website. I find myself cross referencing your photos for our build (Sarah 35) Thank you…. instructional and inspirational.
Love the name thought I find myself doing too much pausing and reflecting at times and not enough sanding.
Also smiling at the 100 billion song quote.
Blessings Greg & Bernie Booth
LikeLike
Wow: great to hear from another Sarah builder! It gets a bit lonely down here, most seem to be in Qld. Glad our writings of some assistance. We have had a lot of help from a few trusted sources. We have great help from Peter Newman, one of the few cat builders in Tas. He built a Simpson 11, 10 years ago and had gradually modified her to how he wants her. What stage are you up to with your project?
LikeLike
Hulls joined, bridge deck in, working on the cabin sides….. and a bit here and a bit there.
We’d love to drop by for a squid if we get down your way?
LikeLike
Would love to catch up and compare notes Greg. We are only 15 min from the TT terminal if you come by car. Where are you based?
LikeLike
We’re in Lismore NSW, but are coming down to Melbourne during the September school holidays. Thought we might zip over for a day or two in Tassy. Once we sort out the details I can firm up a time. Maybe bring some work clothes!!
LikeLike
Sounds great. We’ll be here! When you’re sorted flick me an email for address details: peter.imms@me.com
LikeLike
Great progress. Wish I could visit but alas not till next year.
LikeLike
Thanks Dean. I have to admit this is the funnest bit so far … but I may not feel the same way after clambering around on top screwing/ resining/gluing all the bits on. It’s pretty tight up there under our shelter. If you can somehow get a space with 5 or 6 meters height it will be much easier. Next year? … you heading down under? How exciting!
LikeLike
I’m soooooo excited!!!!
If I’m this excited for you I can’t imagine what’s going to happen when I get to this point. Please do t stop sharing.
Cheers Dean
LikeLiked by 1 person