It may be surprising to some how few tools are needed to build a boat, even a large project like Selah. It’s a question of budget and scope. Here is a list of the tools we have used. I publish this as a guide for anyone who may be considering building.
I have split them into three categories: Handtools, Power Tools, Measuring Tools & Big Ticket Tools. We consider them the minimum, but extras such as a Table Router, Bench Press Drill, Thicknesser/Jointer, and an Angle Grinder would also be welcome additions.
Along the way, we also purchased a cheap eBay Pipe Bender to build the shelter, A Supplied Air Respirator from https://www.turbineproducts.com/respiratory-protection/, plus a high-end respirator for Debbie, plus various hearing protection solutions.
Handtools
You will need a couple of sets of many of these handtools, especially the marking and measuring tools. This is because you are mostly working at two places at once: one set for the workshop workbench and another up in the boat at whatever installation is on the go at the time. The good thing is that these are lifetime investments that will have a life beyond the project.
You can never have too many clamps. These are the heavy-duty Irwin Quick Grips. Expensive at around $40 each, we have three, and use them every day. We also have dozens of Springs and G Clamps of assorted sizes.
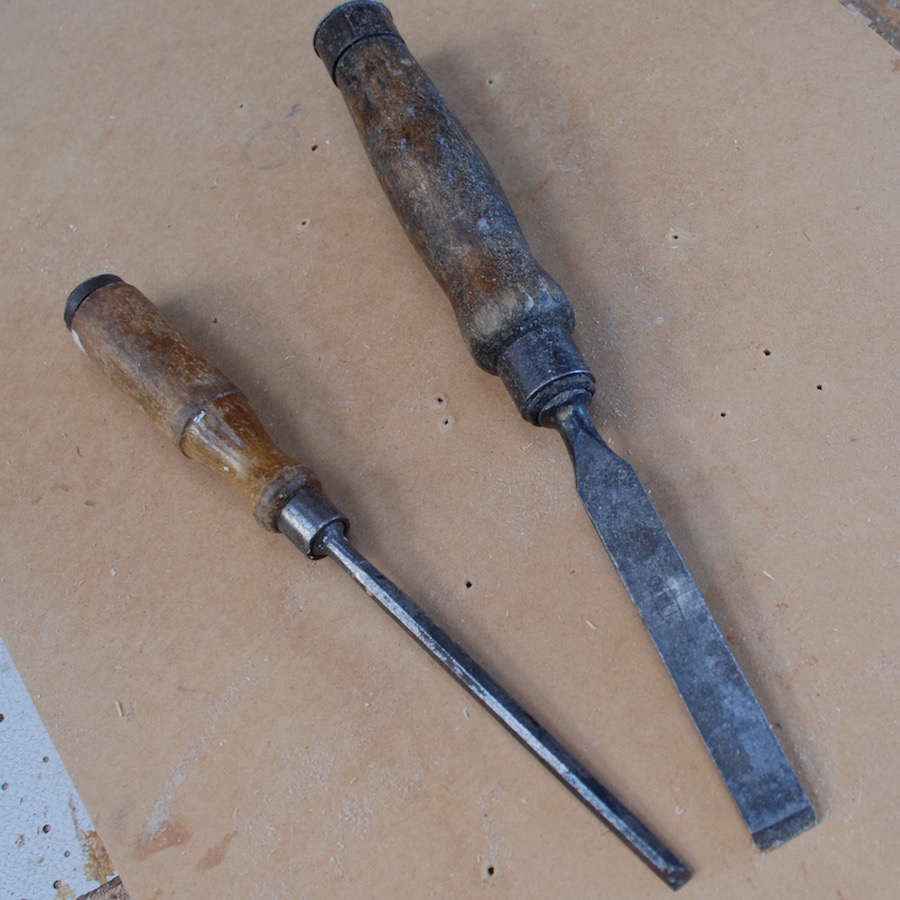
Chisels. I have half a dozen old hand-me-downs I have accumulated over the years, plus a couple of rubber mallets. The trick is to keep them sharp.
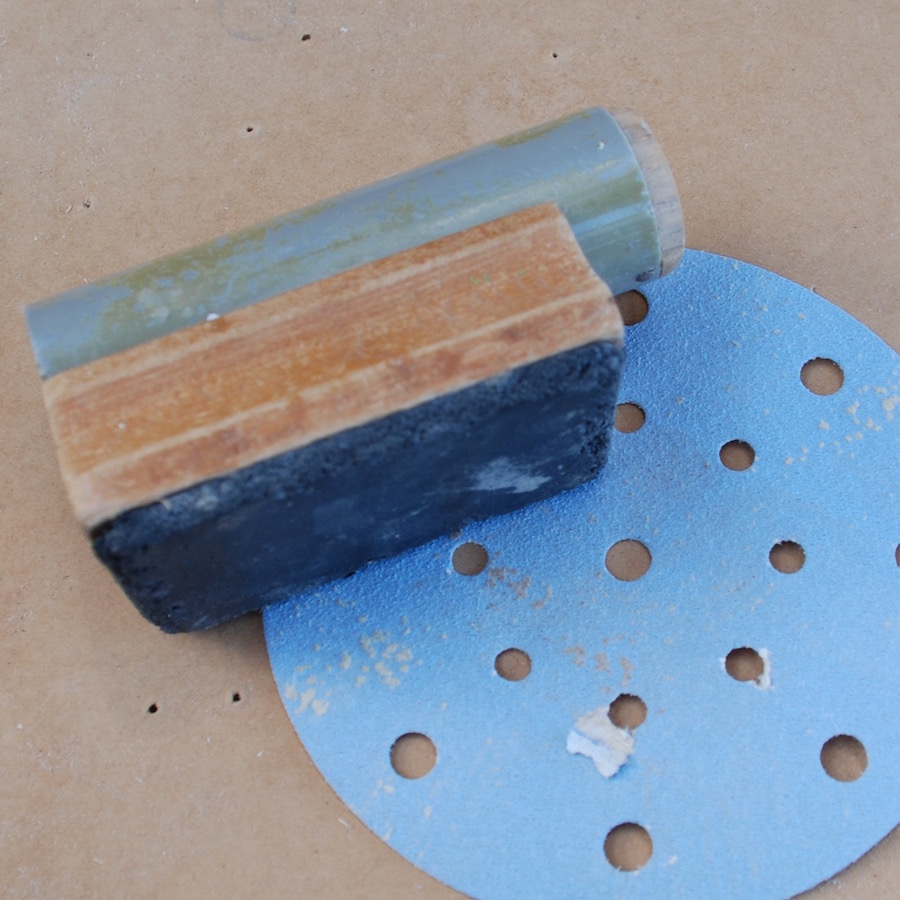
Sanding blocks & paper. Plywood & pine has a tendency to chip when cut, which needs cleaning up as you go. Buy sandpaper in bulk: you will use it all. Its easier to smooth components on the bench, than when they are fitted in hard to reach spaces.
The humble file. I have half a dozen, that are left scattered around the build and are used all the time. We have found them to be the best option to fair out glue glibs and screw tips without digging holes in the surface.
It’s suprisingly easy to burr the heads of stainless screws with power drivers. The best way I know to get them out is with a pair of pincer clamps.
Hand planes. Not cheap, unfortunately, but essential when working with ply & timber. They are sought after on Ebay so command a premium price. If you can’t raid grandpa’s old shed, try doing the round of garage sales.
A good block plane is essential for trimming and edging duties. This is an Ebay cheapo. A proper Stanley model is around $250. This one only cost me $15 but the iron (blade) doesn’t hold an edge very long. I’m on the lookout for a better quality iron, which I think will turn this cheapo into a very serviceable tool.
Measuring & Marking
These are the foundational tools I use the most. Bunnings have inexpensive sets of metal rules containing various sizes. You will need two or three each of 300mm, 500mm & 100mm lengths. The more the merrier.
Time spent accurately marking up is never wasted. Actually, I have found the regular pencil sharpener pictured do not cut the mustard. They blunten within a week, and wreck the pencils. I am currently on the lookout for a classic school room bench mounted sharpener. I have not had much luck with clutch pencils, they seem to break within a few days.
My favorite tool. I can’t imagine building Selah without it. $200 from Bunnings, but I think there are new, less expensive models available now. I purchased an inexpensive case to protect it. Make sure you have small and regular size tripods,
A pair of vernier calipers, $15 from Super Cheap have been invaluable, for both measuring and scribing duties.
Power Tools
These guys are indispensable, but they cop a beating. It’s impossible to stop them from getting caked in epoxy, and because of that, I would suggest steering away from the top-line cordless tools, and go for the second string models. Another option would be to treat them as disposables and buy multiples of the el-cheapos if you can find half-decent ones. I have an impact driver, drill plus a cheapo drill with a countersink head permanently installed. That way I could drill, countersink & drive without changing bits. An impact driver is a must because they are fast. On a build like ours, we will be driving thousands of screws and the speed makes a big difference.
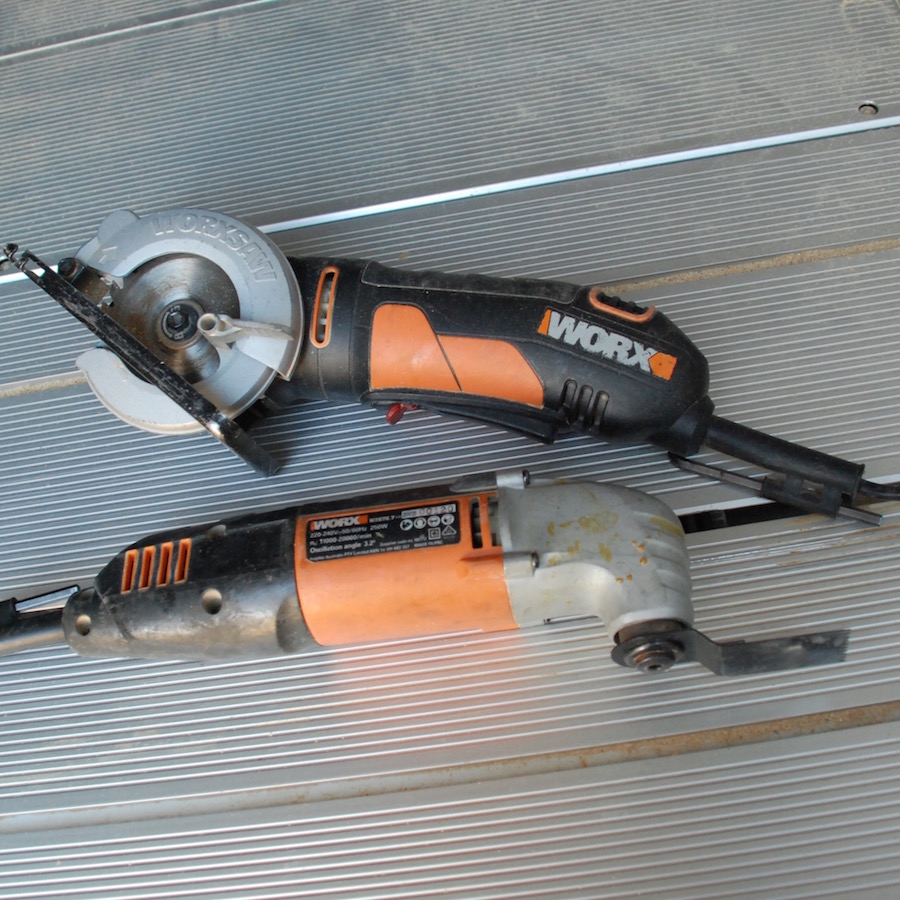
If you don’t mind corded tools, at around $100 these have been the best value tools we have bought. They have a three-year warranty, and to me, the build quality feels as good as the bigger brand names. The baby circular saw is a champion. It has done all the frames and all the major big sheet cuts, that are too hard to get onto the table saw. Due to its small size it is easy to cut incredibly accurate and straight cut without the need to follow up with a plane, as with a jigsaw.
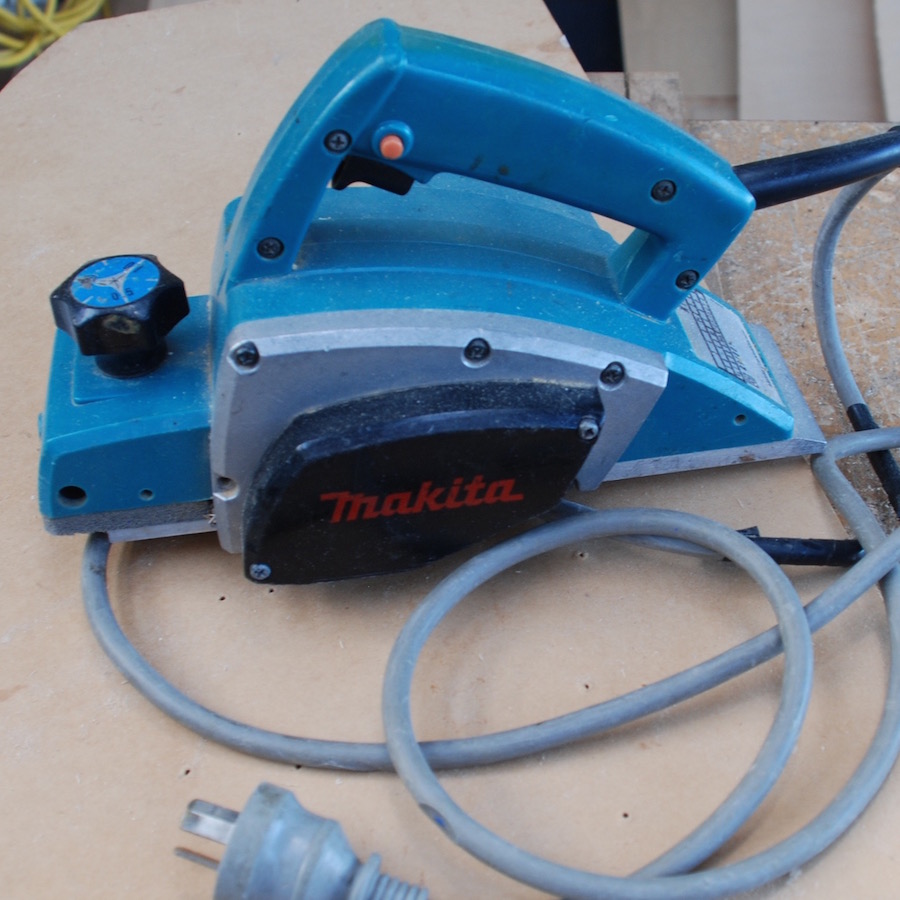
On our build, there was a lot of planing when beveling the stringers, frames, and shaping the stem. A lot of material needs to be removed. I was fortunate to have the use of this older Makita which is worth around $250 in today’s dollars. I’m not sure a cheap plane would survive. Like all blade tools, using sharp blades is critical.
Once you move into the internal fit-out, there is a lot of edge trimming and beveling to do. I began with a borrowed unit until I realised how useful these edge trimmers are, so I purchased one. I needed it quickly, so I paid $99 but I think they are a little cheaper if you shop around.
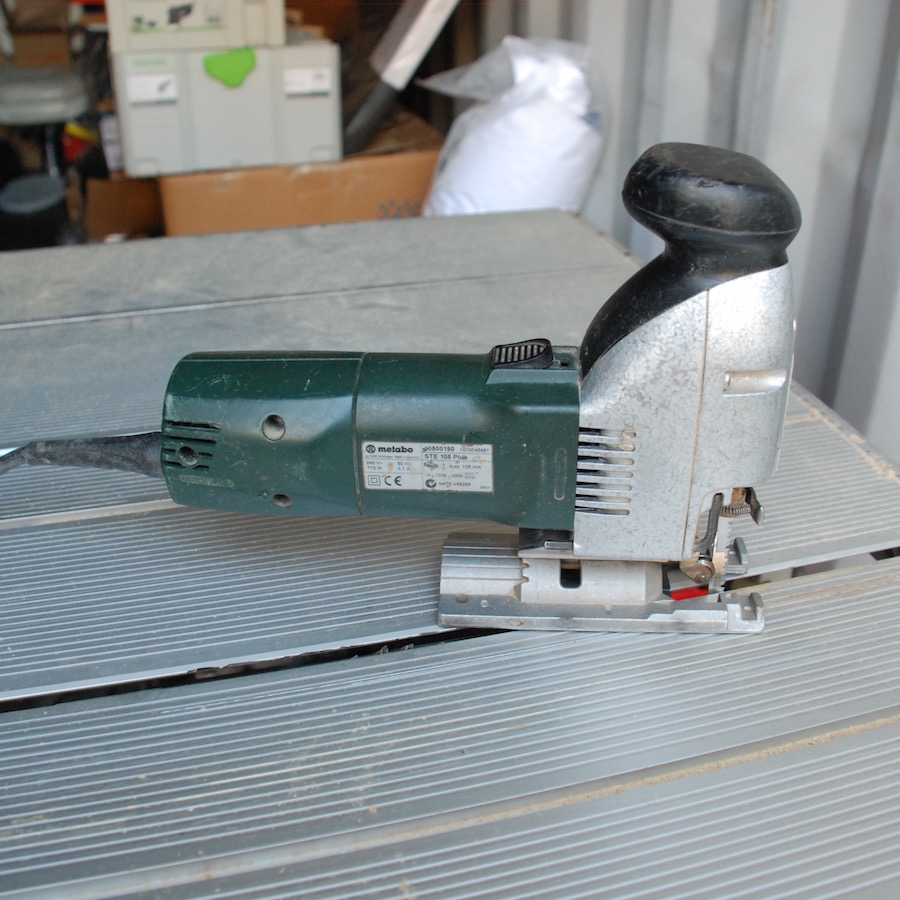
A jigsaw is another must-have. This is a heavy-duty Matabo, and is excellent, but a cheaper model would be suitable, as it is mostly used for notching and small trim cuts. I have learned the trick to minimizing “wavey” cuts is to reduce the cutting speed, go slow, buy the blades in bulk and replace them often.
Big Ticket Tools
We now move onto two expensive tools that we use on a daily basis. Some may argue that is it not necessary to purchase top brand tools, and they may well be right. We can only say that we can’t imagine doing the build without them.
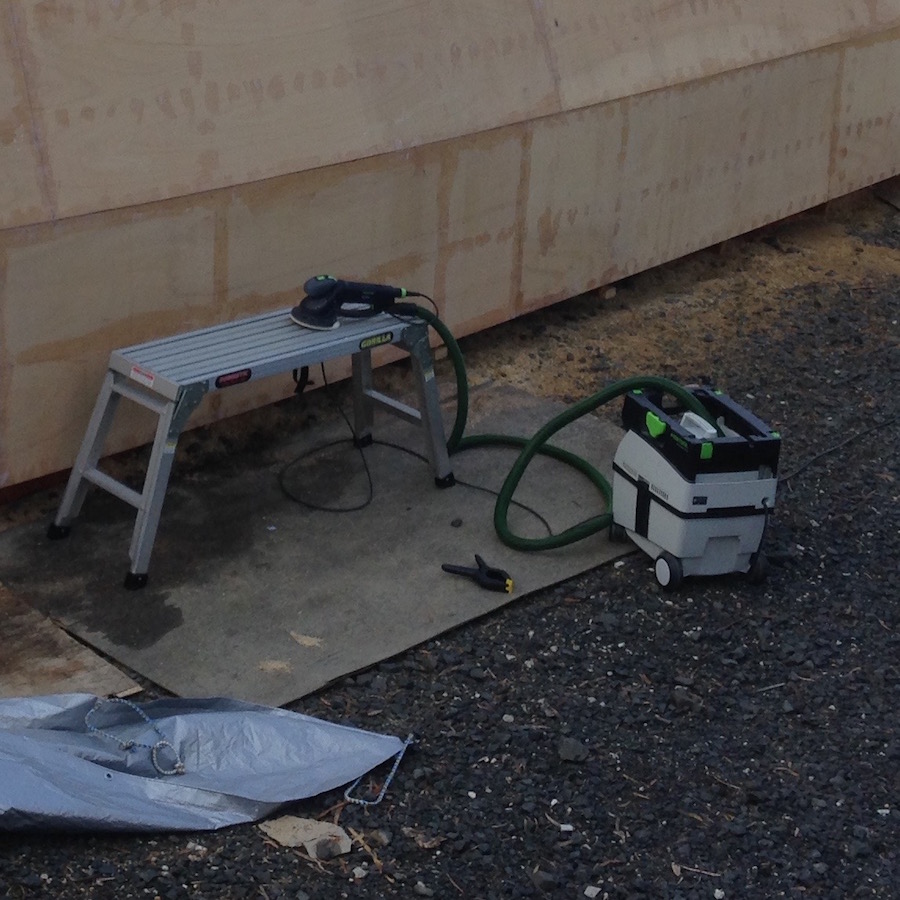
This is our Festool table saw. At a retail price of over $3000, ordinarily, it would be way beyond our reach, except we were lucky enough to pick it up second-hand. It’s fast to adjust and accurate to within half a millimeter. If you can afford to pick up a high-end saw you won’t regret it.Our Festool Rotex 150 Orbital Sander & vacuum combo. At $1800 This was the most expensive tool, we have purchased. We were advised that regular hardware store sanders would not last the distance on our build. We have never regretted the purchase. A vacuum extraction system is an absolute must, especially when sanding Qcell.We purchased this excellent supplied air unit from https://www.turbineproducts.com/respiratory-protection/ in the US, before GST was imposed on online sales in Australia, so it was reasonably priced. We also purchased a Sundstrom half face respirator. Not cheap, but worth every cent.