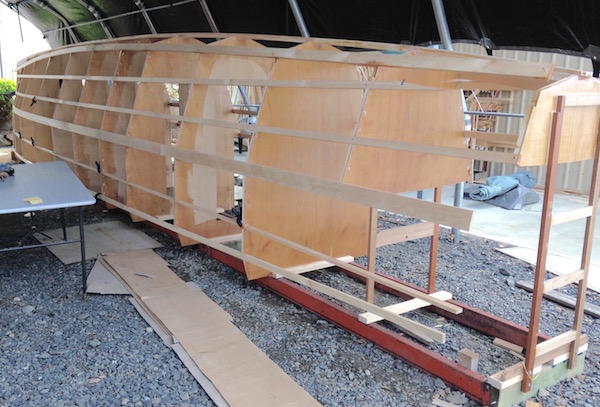
Its been a good week. The stringers and chines have been installed on the starboard hull. deb has filled all the screw holes with builders bog and sanded them back. She has also sealed all the bulkheads and frames with the first of three coats of epoxy resin. Selah is designed with safety watertight voids, forward and rear. They are large, approximately a third of each hull. It is tempting to use them for storage, but we have decided to keep them as designed. They ensure that Selah is unsinkable, and there is ample storage without them. Deb is working hard to have them sealed and filleted, before we sheet the hulls.
There are some critical aspects of this style of boat building. Firstly it is imperative that all the glue joints achieve 100% bonding. Epoxy is a bit like welding for wood. Properly done it impregnates the timber joint, and creates a bond stronger than the host timber. To achieve this the joint must be pre-saturated with epoxy to avoid the possibility of “dry joint”. The glue is then added while the joint is still wet, without over clamping. This process ensures the epoxy chemicaly bonds to the saturated wood. We have been fastidious with our glue-ups.
Secondly we have decided to coat all internal surfaces with three coats of epoxy, including the surfaces to be painted. This seals the timber and ensures the longevity of the vessel. With proper maintainance Selah could still be floating in a century.
Before we left Alice, some dear friends gifted us with a generous Bunnings voucher as a farewell gift. I used it to buy a Bosch laser level. It was a decision I have not regretted. We have used it every day. The picture below shows it in use, shooting levels to check the alignment of the stingers. It’s saved my bacon a few times.


